
Hi everyone! I have a very exciting tutorial!
I'm going to tell you about my love affair with the 60 gram crepe paper. It's the best choice for making delicate flowers such as roses, peonies and many other flowers.
Here is what you need to get started:
* Scissors
*Tweezers
* A cotton ball
* Thread
* Glue gun
* Pliers
* 16 Gauge flower stem wire
* 180 gram crepe paper - I chose Carte Fini # 591 Ivy Green
* 60 gram crepe paper - #212 Bougainvillea

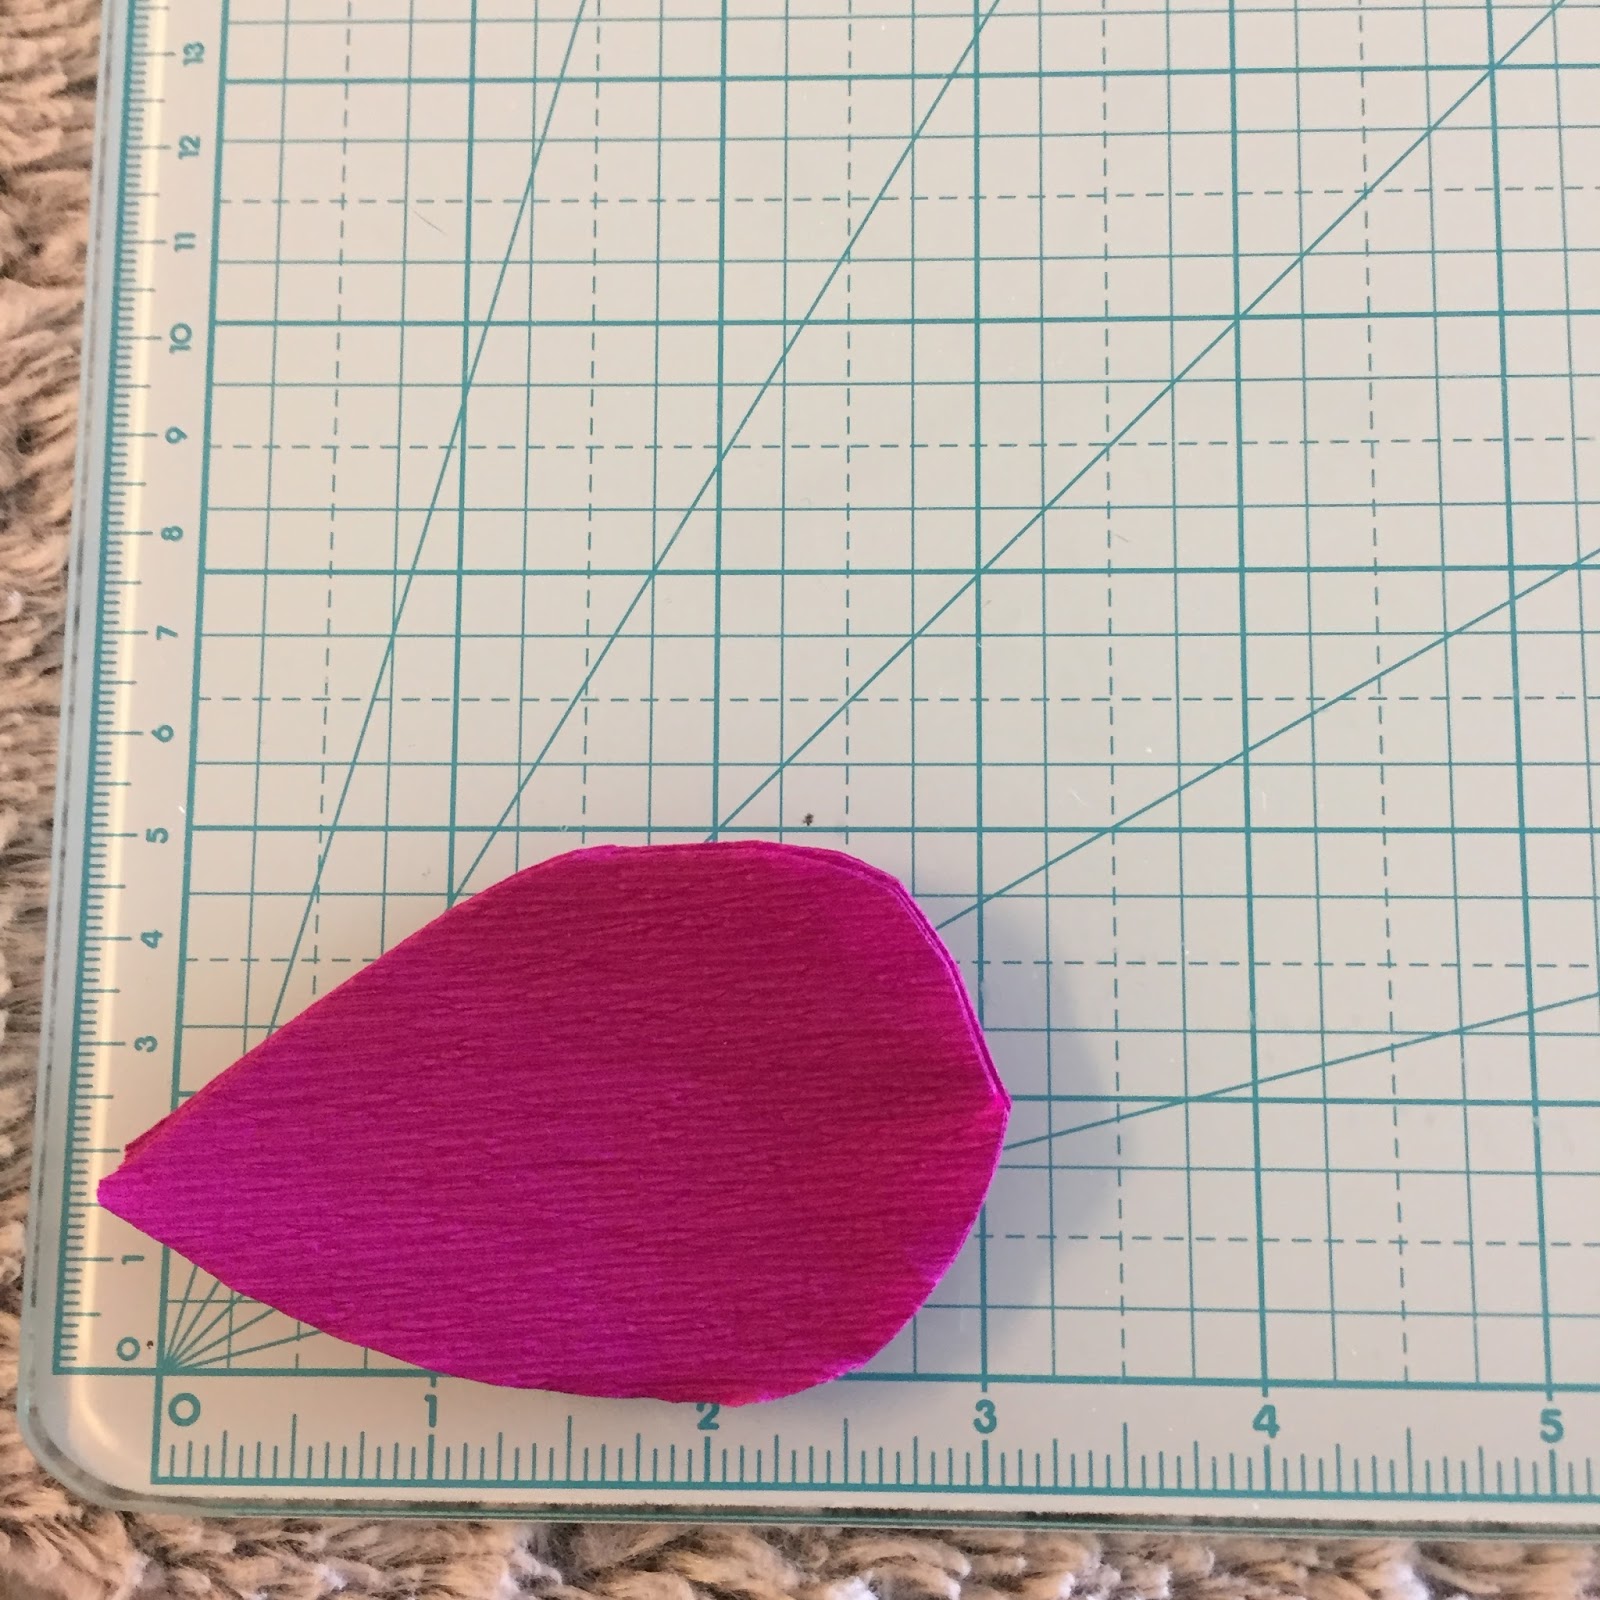
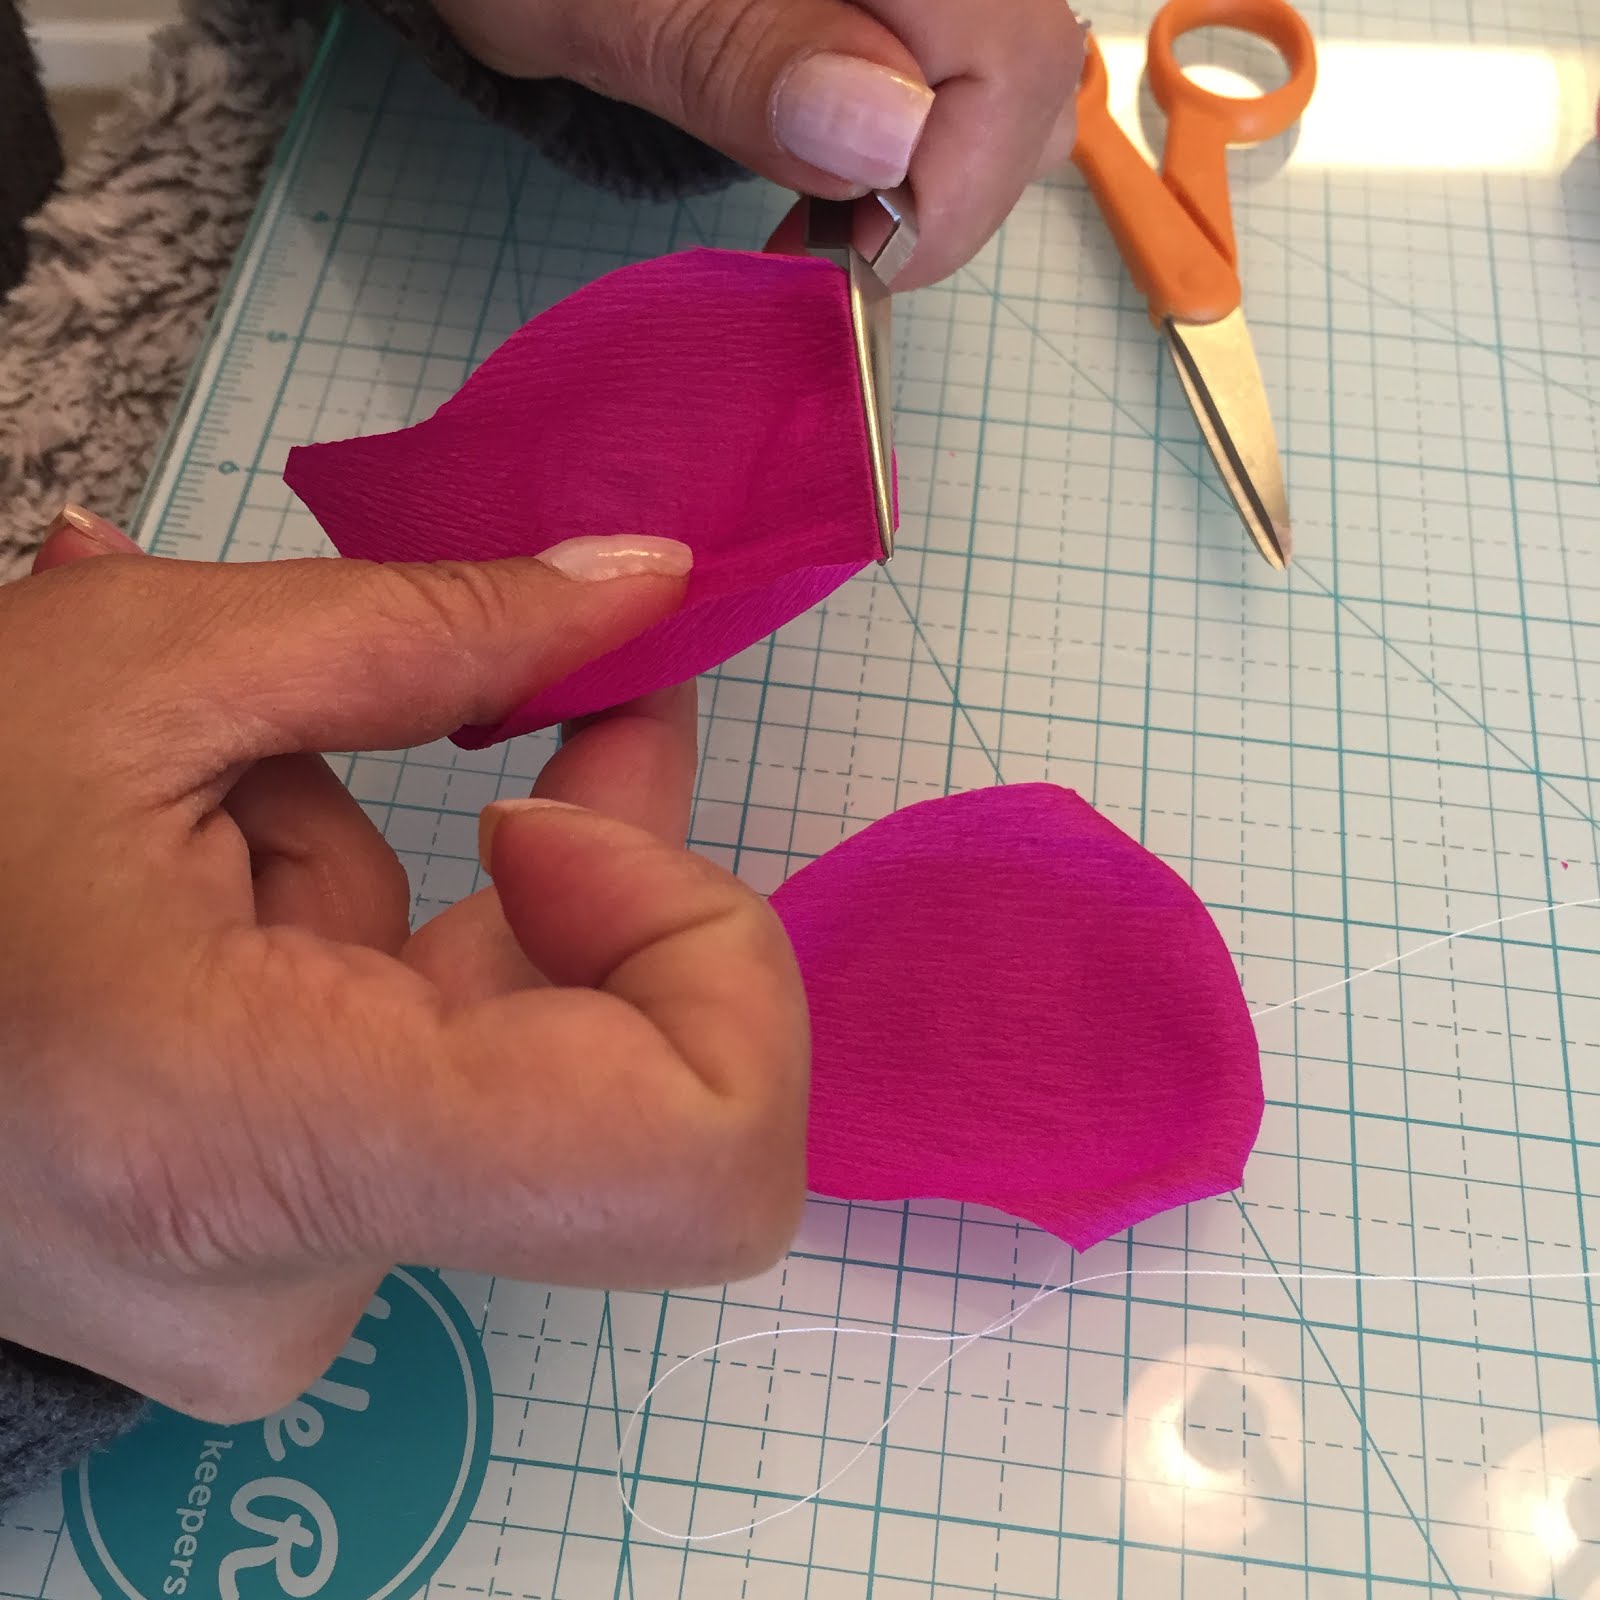
Roll out 3-1/4 inches of the paper and cut across the grain. Then fold your paper 5 times along the grain and cut out the petals as shown in the picture:

* Scissors
*Tweezers
* A cotton ball
* Thread
* Glue gun
* Pliers
* 16 Gauge flower stem wire
* 180 gram crepe paper - I chose Carte Fini # 591 Ivy Green
* 60 gram crepe paper - #212 Bougainvillea

Roll out 3-1/4 inches of the paper and cut across the grain. Then fold your paper 5 times along the grain and cut out the petals as shown in the picture:


Now take a piece of cotton ball and one square piece of crepe paper measuring at 5 inches by 5 inches and stretch out to the maximum. Next place the cotton ball in the middle of the paper and bring the sides together and tie the end with some thread:


Next, take your first petal and slightly stretch and wrap around the bud using your hut glue by adding just one small dot on each side of the bud. Then hold tightly until the glue has cooled:


Now use the thread to tie the bottom of the petal to the bottom of the rose bud:

Take the second petal and place it on the side of the bud and repeat the process as before. Do this process a few more times until you achieve your desired rose bud:


Take the second petal and place it on the side of the bud and repeat the process as before. Do this process a few more times until you achieve your desired rose bud:


Now let's start blooming your rose. Take another petal and slightly cupping it with your two thumbs just as I've done in the picture. Use a petal tweezers to shape the top part of your petal by rolling the petal away from you as I've demonstrated:


Then wrap the new shaped petal around the rose bud and place a dot of hot glue on each side of the bud to hold the petal in place. Now wrap the thread around the bottom of your petal to the bud every time you glue your petal:


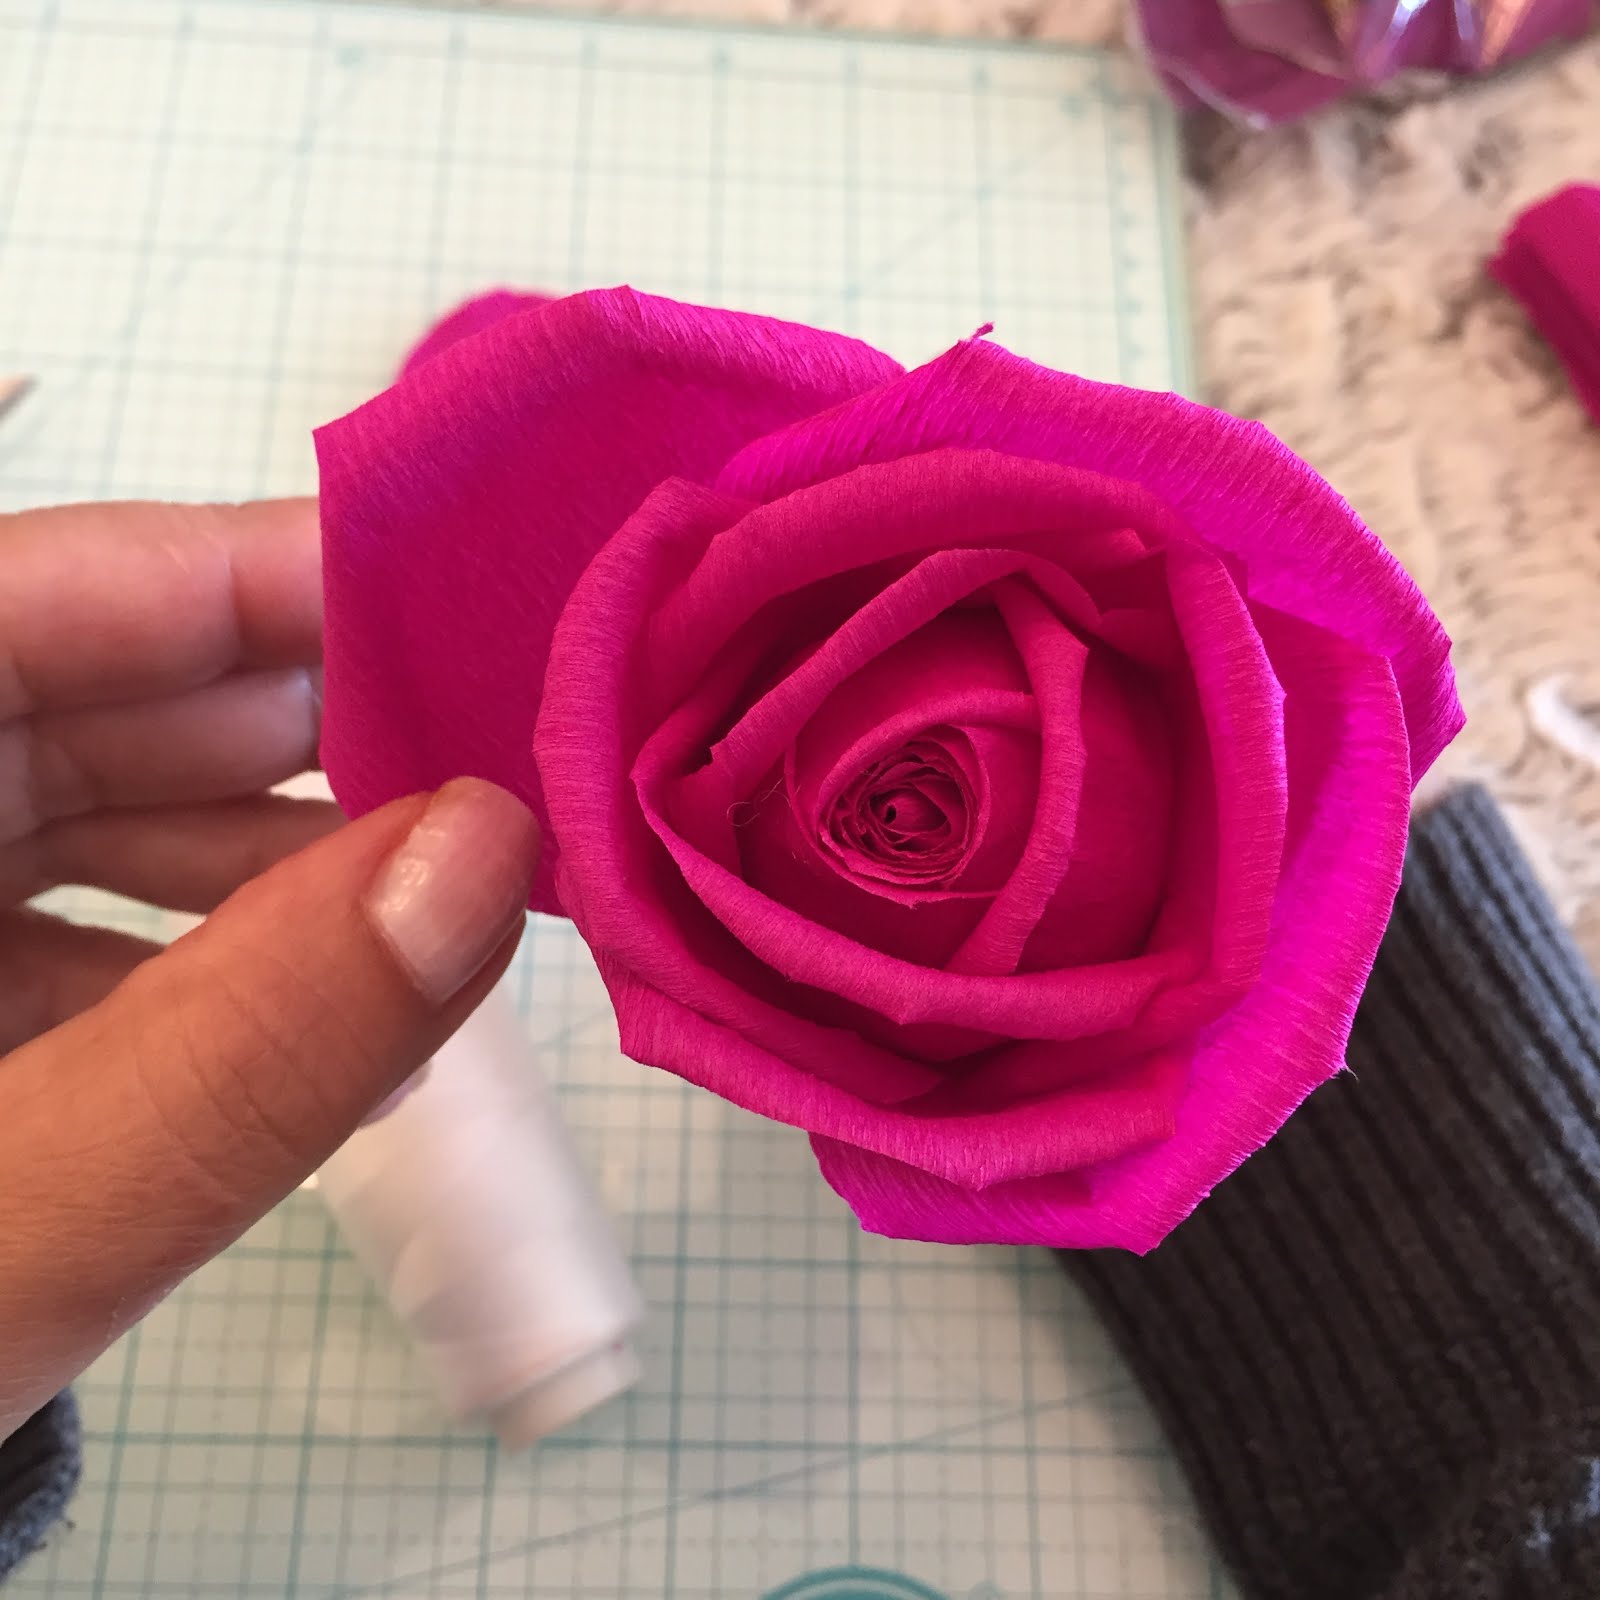
Repeat this process a few times until you achieve a half bloom rose. Now start shaping the rest of your petals by cupping and shaping the petals with your petal tweezers. Turn the petals a little more inward just like the ones I've done in the picture:
 Wrap each one around by over lapping the other until you achieve a full bloom rose. Wow!!! Look at what you just created with the most delicate yet sturdy paper. I love using the 60 gram crepe paper because once you've manipulated the paper by using either your fingers or the petal tweezers, it will look so real:

The next step is to cover the rose bud and the stem with the green crepe paper. Cut a 1/2 inch width and 20 inches length strip:

Then use a dot of hot glue at one end of the strip and start wrapping it around the rose bud going all the way down to the bottom of the stem:


For the final step, cut out five pieces of calyx just as show in the picture and use hot glue to affix hem to the bottom of you rose:


Then use a dot of hot glue at one end of the strip and start wrapping it around the rose bud going all the way down to the bottom of the stem:


For the final step, cut out five pieces of calyx just as show in the picture and use hot glue to affix hem to the bottom of you rose:

Congratulations!!! You just created a beautiful rose!!! I hope you enjoyed this tutorial. I would love to hear any feedback or suggestions you may have for my next tutorial.
All the best,
- Roya -


